Freezer Paper Raw Edge Applique Tutorial
This is just a basic tutorial on using freezer paper to do raw edge appliqué. It has many uses…you can use it on pretty much any sewing project from quilting to garment making, so it’s really versatile. Raw edge means that the edge of the fabric is visible, which if the fabric will be washed, will give it a scruffy look which some people like. If you’d rather have nice smooth edges, well that’s another tutorial that I’ll do later.
Freezer paper is usually easy to find in the tin foil/Ziploc bag section of the grocery store or Walmart. I love it because it’s very easy to use – NO mess, and you can save the templates you make and even reuse them!
For this tutorial you will need:
Freezer paper
two fabric scraps
scissors
iron
pencil
sewing machine and thread (or you could hand sew it)
8” piece of ribbon (optional)
small button (optional)
spray starch (optional)
hand sewing needle or glue to attach the ribbon/button (optional)
two fabric scraps
scissors
iron
pencil
sewing machine and thread (or you could hand sew it)
8” piece of ribbon (optional)
small button (optional)
spray starch (optional)
hand sewing needle or glue to attach the ribbon/button (optional)
So let’s get started….

The first thing you’ll need to do is take some freezer paper and observe that it has a shiny side and a dull paper-ish side. Think of the shiny side as the “glue” side. The paper side is what you want to write on. So first draw your appliqué piece. I chose a heart. Keep in mind that if you are doing letters, you will want to write them backwards because it will be a mirror image! You’ll see what I mean in a bit.
Next take your fabric scraps and spray them with a little starch and then press. This will get out the wrinkles and give you nice crisp fabric pieces to work with.
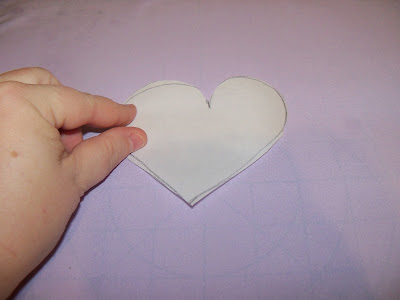
Cut out your design from the freezer paper and place it onto one of your fabrics, shiny side DOWN onto the WRONG side of the fabric. This is important.
Now hit it with a hot, dry iron for a few seconds.
Once you do this, let it cool for a second unless you want to burn your fingertips like me lol. You'll notice that the paper is now stuck to the fabric. YAY that's what we want! Now just cut out your design around the freezer paper.
As you can see here, one side is the paper, the other side is the RIGHT side of the fabric.
Now we simply peel off the freezer paper - no stickyness, no mess!
Now at this point you can label your "template" if you want to and set it aside in case you want to use it later. The shiny side wont be as shiny as it was, but you should be able to get some more use out of it.
Now just lay your heart design onto your other fabric.
pin that bad boy down...
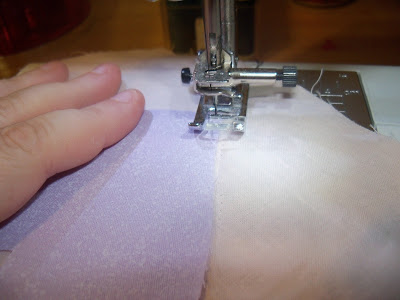
Take it to the sewing machine (or hand sew it)
When you reach a curve, be sure to lift the presser foot (with the needle down) and turn the fabric slightly...
Put the presser foot back down and continue. Rinse and repeat until you get back to where you started.
I chose to do a few different stitches just to show you some different looks you can get depending on the stitch you use. I'll show you which ones I used in a minute. But first, we have a problem. There are two ugly threads hanging off the front of our pretty little design!
We can fix that! Just turn it over and pull gently on both of the back threads. You'll notice that it forms a tiny loop. Use your seam ripper or something else sharp and pull on that loop.
And voila....all 4 threads are now at the back. You can clip them or tie them and then clip them, as I did here.
Now you can see the various stitches I used. Zig zag stitch which is one of my favorites, then a blanket stitch and then a straight stitch. If this were a real project, I wouldn't do that lol....nor would I use black thread...nor would I have cut out such a hideous looking heart! But this was just a quick thing for me to show you how to do it....I ended up giving the final product to my girls.
Now just take it to the iron and press it to set those seams in place.
As a final touch, you can let your imagination run wild! I decided to attach a little ribbon and button with needle and thread by hand, but you could also glue it if you wanted to. Or omit it altogether! Wouldn't this make a cute quilt block....pot holder....something? If it were done right I mean. And it took just a few minutes! I really love applique - the possibilities are just endless!! Here are a couple of other things I made with applique recently.....
Seahorse purse for my Banana. The seahorse, eye, cheek and flower are all applique pieces. I wish I could say I drew this design myself, but no....I just googled.
Same goes for this one - not my original design. But isn't she darling? This was for my other daughter, Pickle. There are 12 separate pieces to this applique - it was alot of work!! Then some machine stitching and hand stitching to finish it off. So as you can see, your applique designs can be simple or they can be elaborate. No matter what, I think it's alot of fun and I plan to use alot of applique in my projects!! I don't really feel like much of a noob anymore lol. I'm still learning of course! But I feel like I have a really good handle on things now!


